
Installing Fences on Uneven Terrain: A Step-by-Step Guide
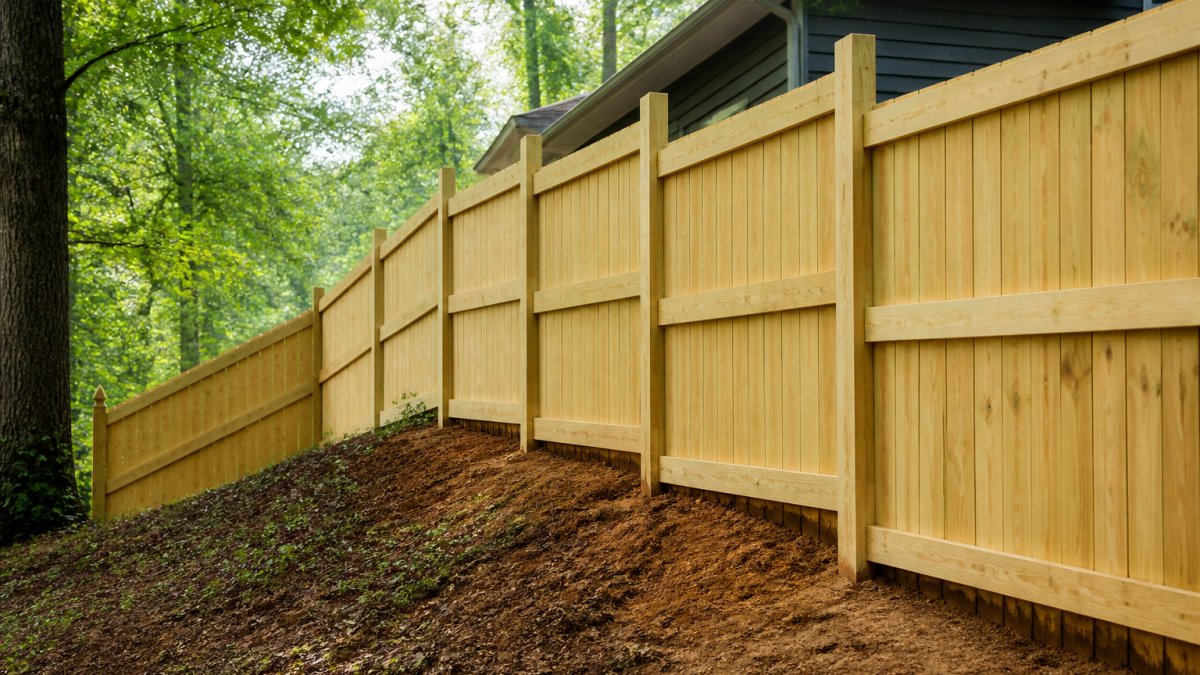
Table of Contents
- Planning and Measuring the Fence Line on Uneven Ground
- How to Measure a Slope for a Fence Installation
- Stepped Fence vs Racked Fence: Which Method Works for Your Terrain
- Setting Posts at the Right Height on Uneven Terrain
- How to Install Vinyl Fence on a Slope
- Managing Fence Gaps Under Sloped Ground
- Common Mistakes to Avoid When Installing Fences on Uneven Terrain
- Frequently Asked Questions
Last Updated: October 9, 2026
Planning and Measuring the Fence Line on Uneven Ground
Installing fences on uneven terrain requires careful planning before you dig the first post hole. The ground's slope will affect every decision you make, from how deep you set posts to whether you step or rack your fence sections. Start by mapping out your fence line and checking for obstacles.
Checking property lines and utility locations
Before marking anything, verify your property lines. Property disputes can derail a project fast. Contact your local assessor's office for a survey map, or hire a surveyor if your property lines are unclear.
Call 811 before you dig. This free service marks underground utilities like gas, electric, and water lines. Wait for the utility companies to mark their lines. Missing a gas line can be catastrophic.
Walk your entire fence line with a neighbor if possible. This prevents misunderstandings later. Take photos of the current boundary and any existing structures.
Marking the fence line with stakes and string
Drive wooden stakes every 10 feet along your planned fence line. Use bright spray paint to mark each stake location. This gives you a clear visual reference for the slope ahead.
Run a mason's line (string) between stakes at a consistent height, typically 3-4 feet above ground. This line helps you see how the terrain rises and falls.
Measure the vertical distance from the string to the ground at multiple points. These measurements tell you exactly how much slope you're dealing with. Record these distances, you'll need them when deciding between stepping and racking your fence.
How to Measure a Slope for a Fence Installation
Measuring slope accurately prevents costly mistakes during installation. You need to know both the total elevation change and the slope angle. This information drives every decision about how to install your fence.
Using a level and measuring tape to assess grade changes
A 4-foot level and a measuring tape are your basic tools. Place the level on the ground at the high point of your slope.
Measure the horizontal distance from the high point to the low point. This is your run. The ratio of rise to run tells you the slope percentage.
For example: if you have 2 feet of rise over 10 feet of horizontal distance, your slope is 2÷10 = 0.2 or 20%.
Repeat this measurement every 20-30 feet along your fence line. Slopes often vary. One section might be gentle while another drops steeply. Document each measurement.
Calculating slope angle and rise-over-run
Slope angle matters when deciding between stepped and racked fence installation. A slope under 10% is gentle enough for racking in most cases. Between 10-20% requires careful racking or stepped sections. Over 20% almost always needs stepping.
Use this simple formula: (rise ÷ run) × 100 = slope percentage.
A 15% slope means the ground drops 1.5 feet for every 10 feet of horizontal distance. On a 100-foot fence line with a 15% slope, you'd have 15 feet of total elevation change.
Write down the slope percentage for each section of your fence line. These numbers guide your installation method choice.
Stepped Fence vs Racked Fence: Which Method Works for Your Terrain
Deciding between stepped and racked fencing is the core choice for uneven terrain. Both methods work, but each suits different slope angles and aesthetic goals.
Stepped fencing means installing horizontal fence sections at different heights as the ground rises and falls. Each section steps up or down to follow the terrain. Stepped fences have a visible staircase appearance.
Racked fencing tilts the fence panels to follow the slope while keeping the top and bottom rails parallel to each other. Racked fences maintain a continuous line despite the uneven ground.
When to step fence sections on steep slopes
Step your fence when the slope exceeds 15-20%. Stepping works best on slopes over 20% where racking becomes impractical.
Stepped installation means building each section level, then stepping up to the next section. You'll have a visible horizontal line between each step. This is common on hillside properties.
Stepping works well with wood and vinyl fences. Each panel sits level and square. The stepped appearance becomes a design feature rather than a problem.
The main drawback: stepped fences create small horizontal ledges between sections. Animals can use these ledges to jump over.
When to rack fence panels to follow the grade
Rack your fence when the slope is under 15%. Racking tilts the fence to match the slope angle.
Racking works by adjusting where you attach rails to the posts. The rails angle to match the slope. The fence panels tilt with them.
Racked fencing looks cleaner and more finished on gentle slopes. It's the standard approach for most residential properties with moderate terrain changes.
Racking has one limitation: gaps form at the bottom of the fence on the downhill side.
Choose racking for slopes under 15% where appearance matters and animal containment isn't critical.
Setting Posts at the Right Height on Uneven Terrain
Post placement determines everything that comes after. Posts must be deep enough for stability and positioned correctly despite the slope.
Determining post depth and spacing for slope stability
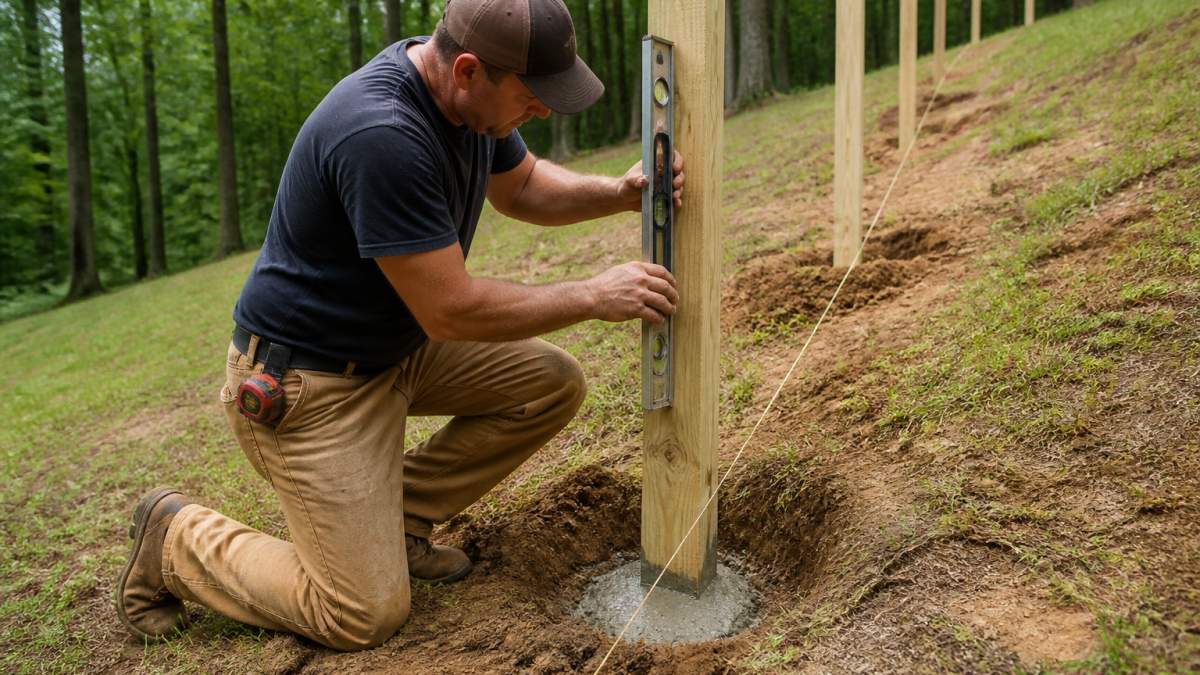
Posts on slopes need deeper footings than posts on level ground. The slope creates lateral pressure that tries to push posts downhill. Deeper posts resist this pressure.
Standard post depth is 24-30 inches for a 4-foot fence on level ground. On slopes, add 6-12 inches of depth depending on the slope angle.
Space posts 6 feet apart on level ground. On slopes, reduce spacing to 4-5 feet. Closer spacing provides more support against the downhill pressure.
Use concrete footings in all cases. The concrete locks the post in place and prevents frost heave in winter. On slopes, concrete is non-negotiable.
Aligning posts in a straight line despite grade changes
Posts must align vertically even though the ground slopes. This means the tops of posts will be at different heights.
Use a transit level or laser level to establish a consistent reference line.
For example: mark 4 feet above ground on each post. On level ground, all marks are 4 feet high.
This approach keeps posts aligned while respecting the slope. Your fence will look straight and professional.
Check alignment as you set each post. Use a long straight edge or string line to verify posts are plumb (perfectly vertical).
How to Install Vinyl Fence on a Slope
Vinyl fencing offers advantages on slopes: it doesn't rot, requires minimal maintenance, and handles moisture well. But slope installation has specific requirements for vinyl.
Vinyl-specific advantages and limitations on uneven ground
Vinyl resists water damage that plagues wood fences on slopes. Moisture runs off vinyl rather than soaking in. This matters because slopes channel water, and wet wood rots.
Vinyl panels are lighter than wood, making them easier to handle on steep terrain. You can install them with fewer helpers.
The limitation: vinyl is less forgiving than wood when it comes to gaps at the bottom. Wood can be trimmed or adjusted. Vinyl panels have fixed dimensions.
Vinyl also costs more than wood. Budget accordingly. The durability advantage often justifies the cost on slopes where moisture is constant.
Attaching rails and panels to follow slope or step
Vinyl fence sections come pre-assembled or as components you assemble on-site. Pre-assembled sections are easier on slopes because you handle complete units rather than individual boards.
For racked installation, vinyl panels tilt with the slope. The rails angle to match the ground.
For stepped installation, each vinyl section sits level. The step between sections is visible but clean. Vinyl's uniform appearance makes stepped fences look intentional rather than problematic.
Attach vinyl panels with stainless steel hardware. Regular fasteners rust and stain vinyl. Stainless hardware costs more but lasts indefinitely on a slope where moisture is constant.
Managing Fence Gaps Under Sloped Ground
Gaps under a fence on a slope are inevitable with racking. You can accept them, hide them, or eliminate them with adjustments.
Why gaps form and acceptable clearance limits
Gaps form because the fence follows the slope while the ground rises and falls. On the downhill side, the fence sits above ground.
A 10% slope creates roughly 6-10 inches of gap under a 4-foot fence at the low point. A 15% slope creates 9-15 inches.
Small gaps are fine if you don't have pets or wildlife concerns. They allow water drainage and prevent the fence from settling into the ground.
Gaps over 12 inches become a problem. Animals can squeeze through. The gap looks unfinished. This is where you need solutions.
Solutions for bottom gaps: trim, skirts, and terrain adjustments
Trim the fence panel. You can cut vinyl or wood panels to fit the slope. This is labor-intensive but effective. The fence sits closer to ground without gaps.
Add a skirt. Install a barrier along the bottom of the fence on the downhill side. Hardware cloth, vinyl trim, or additional wood boards close the gap.
Adjust the terrain. Build up the low side with fill dirt, or dig out the high side. This reduces the slope angle and shrinks the gap.
Step the fence instead. If gaps are unacceptable, switch to stepped installation. This eliminates gaps entirely by building each section level.
Your choice depends on your property, pets, and budget.
Common Mistakes to Avoid When Installing Fences on Uneven Terrain
Most fence failures on slopes come from rushing the planning phase.
Ignoring drainage. Slopes channel water. Standing water rots wood and weakens posts.
Spacing posts too far apart. Slopes create lateral pressure.
Mixing installation methods. Don't step one section and rack the next.
Choosing the wrong material. Wood on a steep, wet slope will rot.
Not accounting for frost heave. Winter freeze-thaw cycles push posts uphill.
Forgetting about access. Can you reach the fence to maintain it?
Installing a fence on uneven terrain is challenging but manageable with proper planning.
Frequently Asked Questions
Should a fence on a slope be stepped or follow the ground?
The choice depends on slope steepness and your aesthetic preference. Stepped fencing works best on slopes steeper than 15 degrees, creating distinct sections that follow the terrain in steps. Racked (angled) fencing follows the ground contour smoothly and suits gentler slopes. Stepped fences are easier to build and maintain, while racked fences create a continuous visual line. Assess your slope angle first, if the grade change exceeds 2 feet over 8 feet of horizontal distance, stepping is typically the better choice.
How do you measure a slope for a fence installation?
Use a 4-foot or 6-foot level and a measuring tape. Place the level horizontally against the ground, then measure the vertical distance from the end of the level to the ground. Divide that measurement by the level's length to find your slope ratio. For example, a 2-inch rise over 4 feet equals a 1:24 slope. Alternatively, use a slope meter or transit tool for greater accuracy. Measure at multiple points along your fence line to identify the steepest sections and plan your installation method accordingly.
How much gap should there be under a fence on a slope?
A gap of 1 to 2 inches under a fence on sloped ground is acceptable and standard practice. Gaps form naturally when fences follow terrain because the ground rises and falls unevenly. Larger gaps (3 inches or more) can allow animals to escape or create security concerns. If gaps exceed 2 inches, consider adjusting the terrain, adding trim boards, or using fence skirts. For vinyl fencing, bottom rails can be angled to minimize gaps while maintaining the panel's structural integrity.
What type of fence works best on uneven terrain?
Wood, vinyl, and chain-link fences all work on uneven terrain with proper installation. Wood fences offer traditional appeal and can be stepped or racked easily, though they require more maintenance over time. Vinyl fences resist rot and weather but have limitations when angling panels on steep slopes. Chain-link fences are durable and affordable, adapting well to terrain changes. Your choice should factor in maintenance expectations, budget, and whether you plan to step or rack the fence. Consult a professional contractor to match your material choice to your specific slope and terrain conditions.