
How to Prevent Fence Post Rot: A 2026 Guide
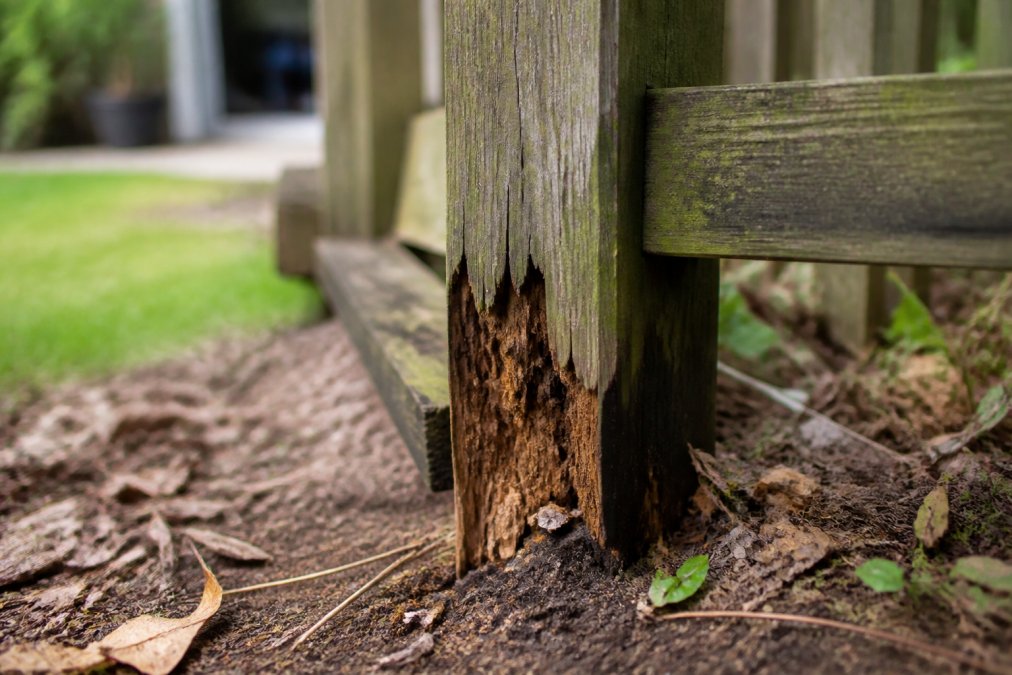
Table of Contents
- Why Fence Post Rot Happens (and What It Costs You)
- Choosing Rot-Resistant Wood Species and Materials
- How Long Do Pressure Treated Fence Posts Last?
- Step-by-Step: Setting Posts to Prevent Rot
- Best Wood Preservative for Fence Posts
- Protective Wraps, Caps, and Moisture Barriers
- How to Repair Rotted Fence Posts
- Soil-Specific Strategies for the Midlands
- Frequently Asked Questions
Last Updated: September 27, 2026
Why Fence Post Rot Happens (and What It Costs You)
Fence post rot is the decay of the buried wood at the base of a fence post, caused by fungi that feed on wood fibers when moisture and oxygen are both present. It almost always starts at or just below the soil line, where water collects and never fully dries out.
Three conditions drive ground contact decay:
- Constant moisture. Wet soil keeps wood fibers swollen and soft.
- Oxygen. Fungi need air, which is why rot starts near the surface, not six feet down.
- Warm temperatures. Decay slows in cold weather and speeds up in summer.
USDA Forest Service Wood Handbook
Choosing Rot-Resistant Wood Species and Materials
The fastest way to prevent fence post rot is to start with wood that resists it. Species and treatment matter more than any coating you add later.
Cedar, Redwood, and Pressure-Treated Lumber Compared
| Material | Natural Rot Resistance | Best For | Watch Out For |
|---|---|---|---|
| Cedar | High (heartwood) | Visible posts, dry sites | Sapwood rots fast |
| Redwood | High (heartwood) | Curb-appeal fences | Cost and availability |
| Pressure-treated lumber | High (chemical) | Ground contact, all soils | Cuts need re-treatment |
Cedar and redwood resist decay because their heartwood contains natural oils. The catch: only the dark heartwood performs. The pale sapwood ring rots about as fast as pine.
How Long Do Pressure Treated Fence Posts Last?
A pressure-treated post in good soil and proper drainage often lasts 15 to 20 years. The same post in soggy clay with no gravel base can fail in under 10.
The treatment is not the weak point. Water is.
Three things shorten post life:
- Poor drainage. Water sits in the hole and soaks the post.
- Cut ends left raw. Every cut exposes untreated wood.
- No moisture barrier. The post touches wet soil directly.
Step-by-Step: Setting Posts to Prevent Rot
Good installation prevents rot better than any repair. Follow these steps and you remove the moisture that fungi need.
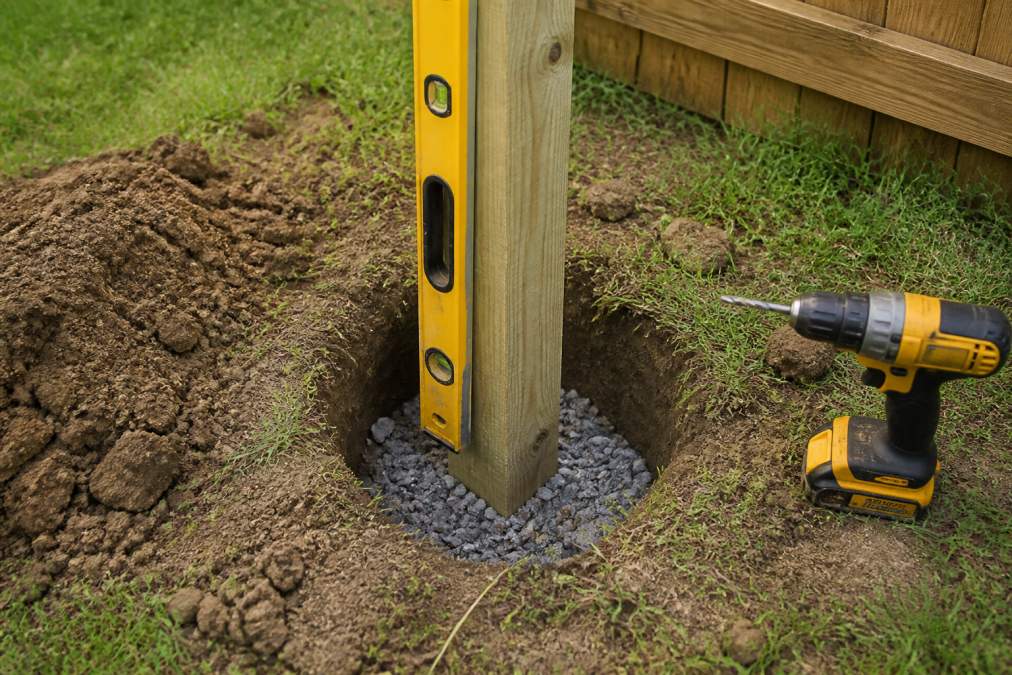
- Dig the hole deeper than the post needs. Add 6 inches of depth for drainage.
- Add a gravel base. Pour 4 to 6 inches of crushed gravel into the hole.
- Set the post on the gravel. The post should never sit in bare soil.
- Check plumb. Use a level on two sides before backfilling.
- Backfill with gravel or soil, tamping as you go. Pack it firm in layers.
- Crown the soil around the post. Slope it away so water runs off.
- Seal every cut end. Brush preservative on any exposed wood.
Post-Hole Drainage and Gravel Base Installation
A gravel base does two jobs. It lifts the post out of standing water, and it lets water drain down and away instead of pooling against the wood.
Concrete Footing vs. Gravel: What Actually Protects the Post
This is where most guides get it wrong.
Concrete holds a post rigid, but it also traps moisture against the wood if water can't escape. A post set in concrete with no drainage rots faster than one in a gravel bed.
Gravel drains. Concrete anchors.
Best Wood Preservative for Fence Posts
The best wood preservative for fence posts is a copper-based or borate-based treatment applied to cuts, notches, and any exposed end grain. These soak into the wood and stop fungal growth at the surface.
A few rules for picking one:
- Match the product to the job. End-cut preservatives for fresh cuts, brush-on sealants for larger areas.
- Re-treat every cut. Any time you cut a post, coat it.
- Don't rely on paint. Paint seals the surface but doesn't penetrate wood fibers.
- Check the label. Look for a copper or borate active ingredient.
EPA guidance on wood preservatives
Protective Wraps, Caps, and Moisture Barriers
A protective wrap or bituminous liner around the buried section of a post adds a moisture barrier between wood and soil. Caps do the same job at the top, keeping rain out of the end grain.
What works:
- Post wraps for the below-grade section
- Post caps to shed water off the top
- Bituminous liner as an added barrier in wet soils
How to Repair Rotted Fence Posts
Repair beats replacement when the rot is shallow and above the soil line. If the post is soft at ground level, replacement is usually the honest answer.
Here's the repair path for surface rot:
- Probe the post. Push a screwdriver into the wood. Soft spots show the depth.
- Cut out the rot. Remove all soft wood back to solid material.
- Treat the exposed area. Apply preservative to the raw wood.
- Fill and seal. Use a wood filler rated for exterior use, then seal it.
- Fix the water problem. If you don't, the rot comes back.
Soil-Specific Strategies for the Midlands
Soil type decides how you set a post, and most guides skip this entirely. Clay holds water. Sand drains fast. Rock changes everything. Each needs a different approach, and the wrong one shortens post life by years.
Clay soil
Clay particles are tiny and tightly packed, so water moves through them slowly. A post hole in clay becomes a bathtub after every rain.
- Dig the hole 4 to 6 inches wider than the post on all sides so you can build a real gravel column, not a thin ring.
- Use 6 to 8 inches of crushed gravel at the bottom instead of the standard 4 to 6.
- Crown the soil 2 to 3 inches above grade and slope it away from the post so surface water never pools at the base.
- Consider a post wrap or bituminous liner here more than anywhere else, because the surrounding soil will stay wet for days after a storm.
Sandy soil
Drainage is rarely the problem. Stability is.
- A standard 4 to 6 inch gravel base is enough.
- Tamp backfill in 6-inch lifts. Loose sand shifts and lets the post lean.
- Concrete collars help more here than in clay because water drains away from the footing on its own.
- Watch for wind-driven sand eroding the soil crown around the post over time. Re-crown every couple of years.
Loam
The middle ground, and the easiest soil to work with.
- Standard gravel base and crown handles most cases.
- If the loam is heavy with organic matter, treat it more like clay, because decomposing organics hold moisture.
Rocky or shallow-bedrock soil
This is the case most guides ignore entirely.
- You often cannot dig deep enough for a proper footing, so the post sits shallower than ideal.
- Use a wider hole and a concrete collar to compensate for the lost depth.
- Ensure the bottom of the hole drains. If bedrock blocks drainage, water sits in the pocket and the post rots from the bottom up.
- In extreme cases, a surface-mounted post base on a concrete pier above grade avoids burying wood at all. It is a different fence design, but it sidesteps the rot problem entirely.
High water table or poor-drainage lots
If the water table sits within a few feet of the surface, no gravel base will keep the post bottom dry. The honest options are a surface-mounted post base on a concrete pier, or a post material that does not rot, such as a steel or composite post sleeve. Burying wood in a high water table is a losing bet regardless of treatment.
How to tell which soil you have
Dig a test hole where the fence will run. Squeeze a handful of soil:
- Holds a tight ball that does not crumble: clay.
- Falls apart immediately and feels gritty: sand.
- Holds shape but crumbles with a light poke: loam.
- Hard to dig, hits rock within a foot or two: rocky or shallow bedrock.
Frequently Asked Questions
How can I prevent my fence posts from rotting?
Start with pressure-treated lumber rated for ground contact. Set the post on a 6-inch gravel base so water drains away from the wood, then apply a wood preservative to the buried section. Keep soil below the post's bottom edge and avoid trapping moisture with tight concrete collars. An annual inspection catches soft spots early, before rot spreads into the structural core of the post.
Will pressure-treated posts rot in the ground?
Yes, eventually. Pressure-treated lumber resists rot longer than untreated wood, but ground contact, soil saturation, and fungal growth still break it down over time. Posts rated for ground contact last longer than above-ground-rated boards. Proper post-hole drainage, a gravel base, and a moisture barrier around the buried section extend the life of pressure-treated posts by years compared with setting them directly in wet soil.
Does gravel at the bottom of a fence post hole prevent rot?
Gravel helps, but only when installed correctly. A 6-inch gravel base under the post lets water drain away from the wood instead of pooling against it. Gravel packed around the sides of the post does little on its own. The bigger win is keeping the post bottom out of standing water and letting air reach the wood. Pair gravel with a post-hole drainage path and a wood preservative for the best results.
What is the best wood preservative for fence posts?
Copper naphthenate and borate-based treatments work well for buried posts because they penetrate wood fibers and resist fungal growth. For posts already in the ground, brush-on preservatives slow surface decay but cannot reverse rot. The best choice depends on whether you are treating new posts before installation or maintaining existing ones. Look for products labeled for ground contact and reapply every few years.
Rot at the base of a post is a water problem, not a wood problem. Fix the drainage and you fix the rot.
If you'd rather not gamble on a post that leans in two years, Fencementals installs wood, vinyl, and chain link fencing with proper post-hole drainage and honest, no-upsell pricing. As a locally owned, veteran-operated contractor, we keep the work site clean and the workmanship solid. Get a quote from Fencementals and set your fence up to last.